Monday, June 18, 2012

*Wedding*

What a fun day we had yesterday as we celebrated the marriage of our good friends. 
My husband and I got to spend Father's Day together doing our favorite things...
bar-b-que and desserts!
A fun sign....inspiration from Love Is... blog


This cute little cake top was made by the couple!

 The Bride and Groom each choose their own cupcake flavor and a favorite cookie.  The Bride wanted Red Velvet with Cream Cheese Frosting and Russian Tea Cakes.  The Groom asked for Haystack cookies and a Coffee Flavored Cupcake.  I was having a hard time coming up with an idea for the coffee cupcake without using chocolate.  After some research I found a Brown Sugar Cupcake recipe and made a Coffee Buttercream.  But to make it just a little bit better I filled the  middle with homemade Caramel Sauce...so good!

 P.S.  Thank you to my brother who made the caramel sauce...he is a dessert chef so he knows what he is doing!
 
My husband made this amazing cupcake tower for me.  I came to him with this idea and he made it even better.  The cupcake stand can have tiers removed/added to make any size of stand needed for my dessert buffets.  The couple wanted the poles to be purple but I wanted to be able to re-use this stand so I didn't want to paint them.  Then I thought to myself "Why not sew fabric tubes that can be interchangeable for all color schemes?"  Worked Perfectly!!


The Dessert Buffet
Gotta love my husband who was willing to pack up my kitchen table!

 The only thing I would like to do differently is have a back drop so you don't see all the "extra" stuff in the background.

Oh...I also would have had a little less wind I was so scared the tower was going to tumble over...scary!


My husbands huge b-b-q.
 He designed and made that thing himself!  
And in honor of Father's Day let me tell you a little bit about this guy. 
 He can make, fix, build and do just about anything that my crazy mind thinks up.  He has a degree in engineering and a general's contractors licenses and a mind that goes a mile a minute.  Because of these abilities (and great patients with me and my picky-ness) he is able to put up with me and my ever changing design ideas.
He also is a great Dad...who I think has officially inspired my 8 year old son to want to be a b-b-q chef! 

 Without him Holly Do. would not be possible. 


Wednesday, May 23, 2012

*Holly Paint*

A client asked me to keep my eyes open for a wardrobe for her new house. Her and her finance have recently moved into an older home that doesn't have any closets so she need someplace to hang her clothes. We both were looking for at least 2 months and finally found this one.  The flower details on the top and the drawers were perfect.  It had a crown molding trim on it when I picked it up but it had been cut so it could fit in a room...so my husband put on a new molding.
I painted it a pearl white and distressed lightly. 
 But my favorite part is the drawers inside.  The client was wanting some color but since she knows her colors will change over time she didn't want to commit to the whole piece being a color.  So we decided to put the color on the inside for only her to see!  I mixed a custom light turquoise and then painted on the chalkboard paint for the labels. 
I painted dots around the chalkboard rectangles for some fun.   Just Perfect!

Tuesday, May 15, 2012

*Holly Paint*

A client asked me to re-do this cabinet that was her husbands from his old home. As you can see it was really basic and plain. She wanted to use it as a bar so some major 
reconstructing had to be done!
My husband removed the bottom 2 drawers and put in shelves.  I painted the cabinet a shabby black with light distressing. Then painted the shelves a dark red for a pop of color. The cabinet door was trimmed with molding for an added detail.


The cabinet use to be a place to hang clothes.  So my husband took out the closet rod and put in a shelf and a
 wine rack for wine glasses.
  
Now this piece is ready for Entertaining!

Monday, May 7, 2012

*Holly Paint*

A friend of mine contacted me to re-do her huge hutch

Though the piece was in great condition and well-made it was definitely dated and not her style.

I started by painted the whole piece Antique Tin by Behr...I can't wait to use more of this color...it is a perfect gray!

My husband cut out the "scrolly" detail below the cabinet doors to give the cabinet a cleaner look.
 The ugly glass doors were replaced with clear glass.
The side glass was replaced with square wire mesh.

And the best part of all....CHEVRON STRIPES!!!

CUTE...CUTE...CUTE...

We went back and forth on what knobs to use and in the end she choose glass knobs which are perfect!

Can't wait to get my hands on some more hutches...


Wednesday, April 18, 2012

*Holly Paint*

These pair of nightstands were brought to me by a client to be painted.  
When she pulled them out of her car I about had a heart attack from "nightstand envy."
 I could just visualize their potential. 
I painted them a pearl white, then distressed all the carved details and finished off with a wax. 
 Amazing pieces if I do say so myself!!


Thursday, March 22, 2012

*Holly Bake*

Yum, Yum here is a good recipe for you!!  

~Rocky Road Shortbread~

I found this recipe tucked away in one of my files. 
 I pulled the page out of Family Circle magazine 
back in November 2009.  
They look fancy but are actually easy to make...
I never should of waited so long!!


Here's the recipe.  Happy Baking!

Rocky Road Shortbread
1 1/4 cups all-purpose flour
1/3 cup walnuts, finely chopped
1/4 tsp. salt
1/2 cup (1 stick) butter, softened
1/3 cup sugar
1 tsp. vanilla extract
3/4 cup mini marshmallows
1/2 cup coarsely chopped walnuts
1/2 cup semisweet chocolate chips

1.  
Heat oven to 350 degrees.  Coat a large baking sheet with nonstick cooking spray or use a Silpat sheet.

2.  
In bowl, beat together butter, sugar and vanilla for 2 minutes or until smooth and creamy.  Stir in flour, 1/3cup walnuts, salt.

3.  
Roll 1 Tablespoon dough into a ball; place on prepared sheet.  Repeat with remaining dough.  Gently flatten each ball to a 1/2 inch thickness and smooth out edges.  Bake for 16 minutes or until edges are lightly brown.

4.  
Meanwhile, melt chocolate chips in microwave.
  
5. 
 Remove cookies from oven and spread each with 1 teaspoon of melted chocolate, sprinkle on walnuts and add a few marshmallows.  Return to oven for 1 minute, until the marshmallows are softened.  Let cool on baking sheet for 2 minutes and remove to wire rack to cool completely.

Tuesday, March 13, 2012

*Holly Paint*

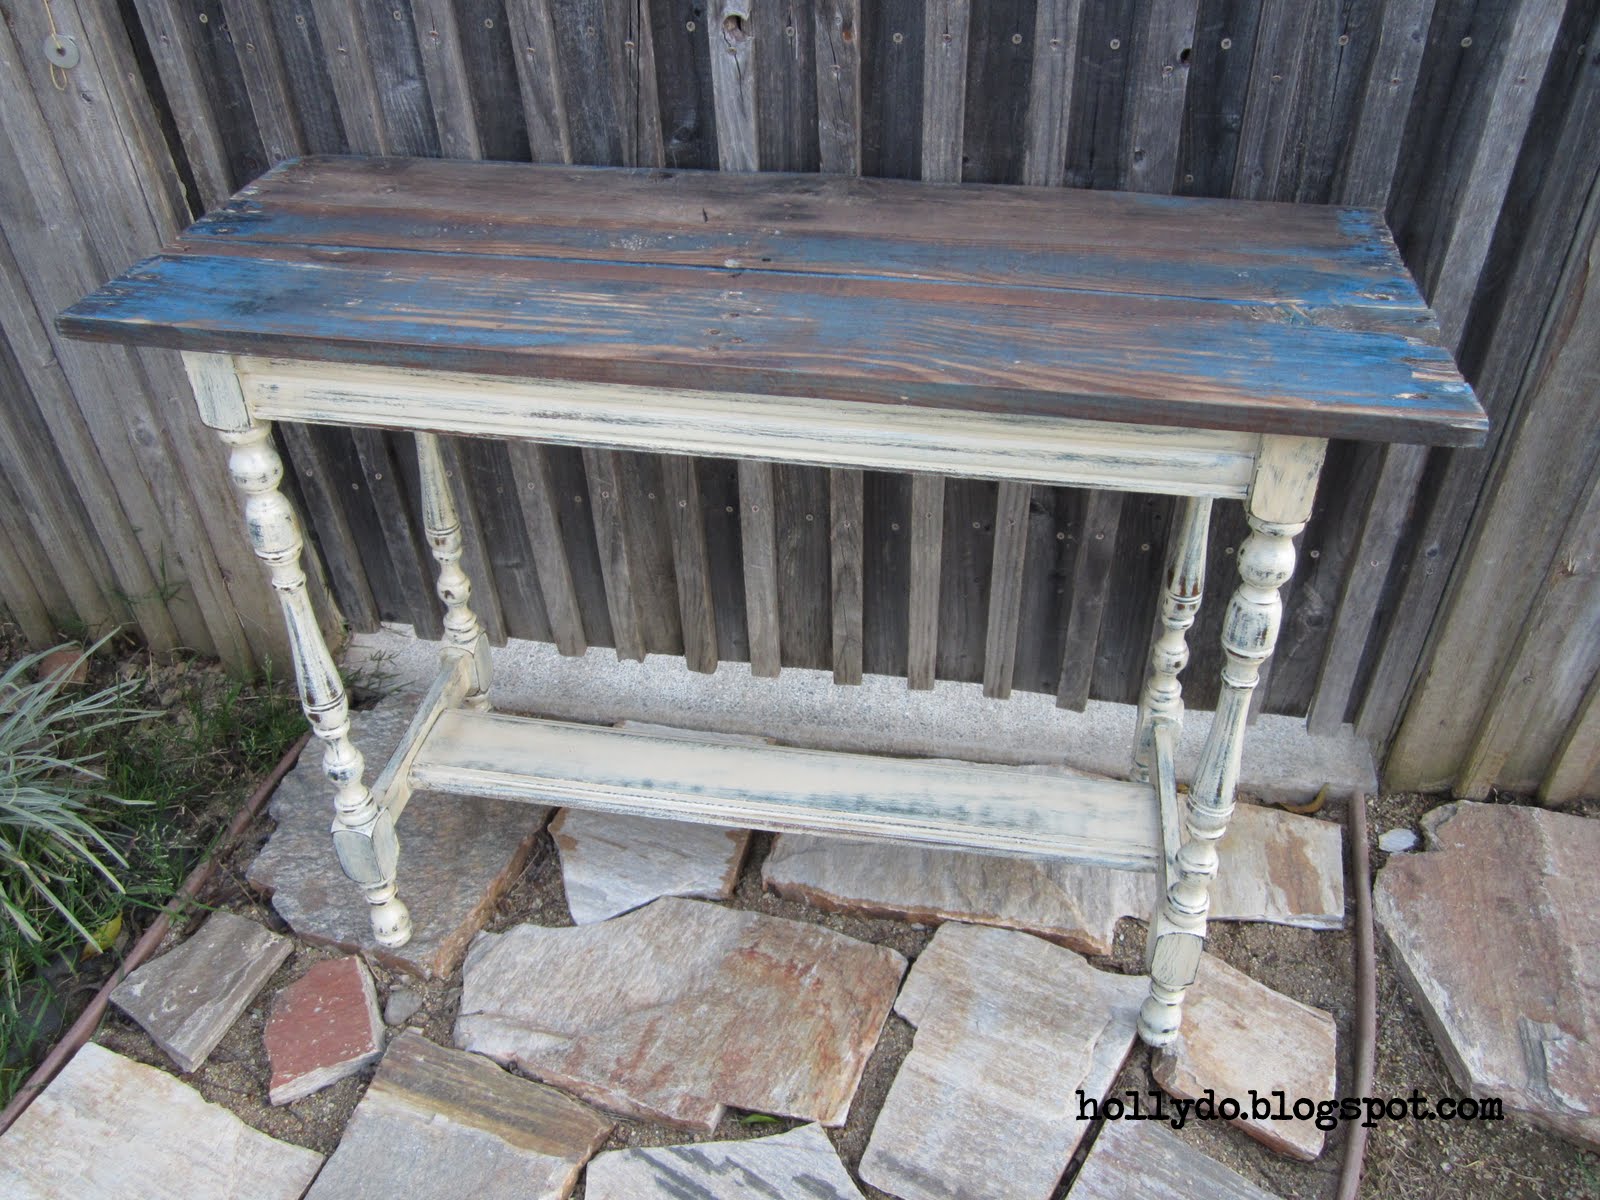
When I found this table I knew it had potential!  

The top was completely split down the middle.  I knew my husband could of fixed the top but I wanted to do something fun instead.   I have been wanting to use pallet wood for awhile now and I had a pallet sitting in my workshop.   
So I had him pull off the broken top and use pallet wood to give the piece a whole new look.

Here's the final table...once again I'm wishing I had a spot for this in my house!   
Perfect as a small buffet table in a dining room (with the farmhouse table I just finished!), as a entry table, t.v. stand, on the patio or just about anywhere.  


I painted the base a dark turquoise first, then put on a thin coat of antique white and heavily distressed. 
 The pallet wood already had the dark turquoise color on it so this allowed it all to work together.  
Can't wait to get my hand on more pallets...I have so many ideas!!


Furniture Feature Fridays
Photobucket


*Holly Paint*

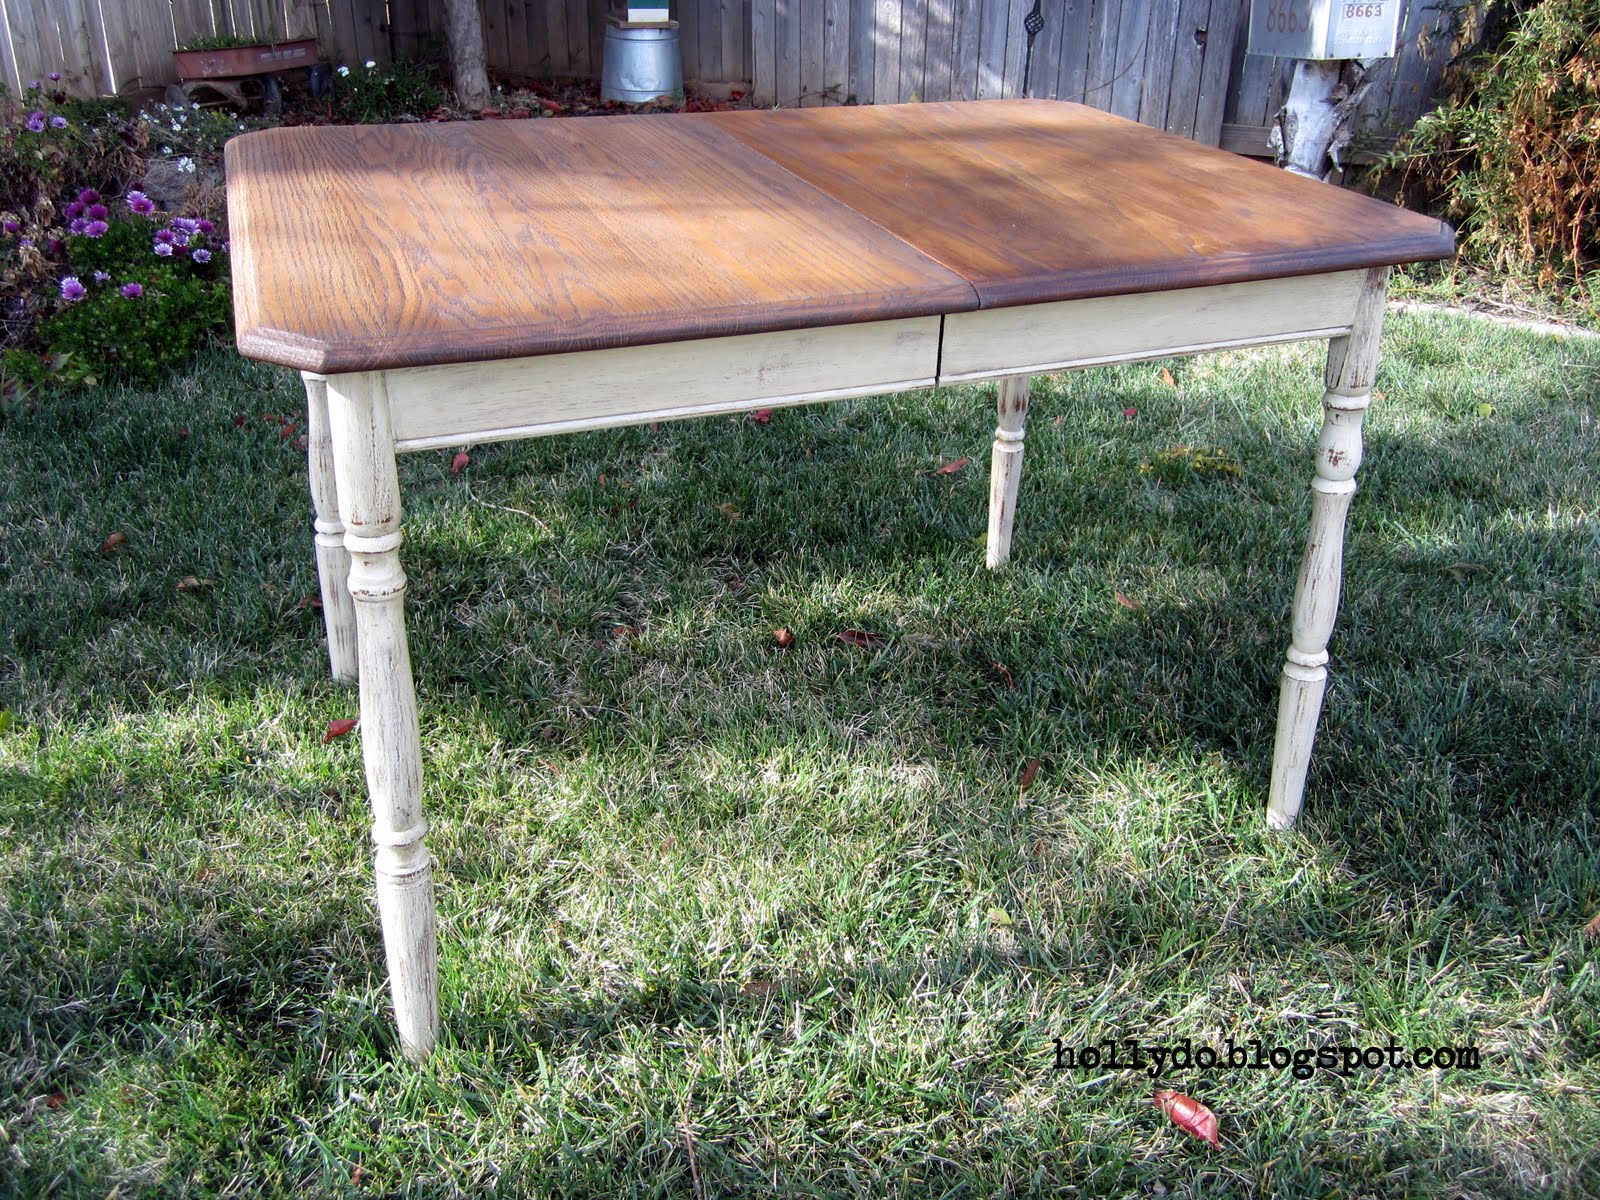
I found this table in hopes of using it in my kitchen but it just wasn't the right size.  
I was so disappointed because I really loved the style plus it has two leaves that store underneath so it was great for large gatherings.  

Oh, well...I guess someone else will get to enjoy it in their home!


I sanded the whole piece, painted the bottom an antique white and distressed heavily.  The top is stained with a dark walnut. 
 I wanted it to look like it came out of a farmhouse!


Here it is with the 2 leaves. 
 Oh...I sure wished it worked in my house!  
I will hate to say good bye to it!